Showing posts with label winter. Show all posts

Sunday, July 9, 2017

Whiteface at Sunset


"Whiteface at Sunset", acrylic paint on canvas, two panels each measuring 24" x 30". 

This painting is inspired by a winter view of Whiteface Mountain at sunset in the Adirondacks. The mountain really does turn the most lovely shades of pink and violet when the sun is going down.

Thursday, May 11, 2017

Foggy Forest


Here's a piece that I made this winter during one of our man snow days. "Foggy Forest", 18" x 24", made through a combination of ink painting and digital work. This piece is available right here in my print shop as a high quality print, as well as on a variety of products.

Saturday, March 28, 2015

Catching Up and New Art

Hello everyone! I know it's been a while since my last blog post. I've still been busy with art (and with life!), I just haven't had a chance to sit down and post. It's been several busy months since I last posted.

Over the summer, my husband and I packed up our apartment and finally moved in to a house of our very own! It's all been very exciting, and I found myself wondering how we ever fit all of our belongings in to our apartment. The past few months have been a blur of unpacking and working on the house. I've been painting rooms, decorating, organizing, etc., and it has been taking up a lot of my free time. I'm looking at you, walls that are slowly being de-wallpapered. We're just now ending a very looooooooong winter full of snow and sub-zero temperatures (thank you, kind neighbors who helped us dig out our driveway!), and I couldn't be happier to see the return of sunshine and plants.


My full-time job, working as a high school art teacher, started again in September. The school year has been going by so fast - I can't believe that March is almost over! Crazy! Set design for our annual high school musical is underway (it's Grease this year), so my weekends have been taken up by that lately.

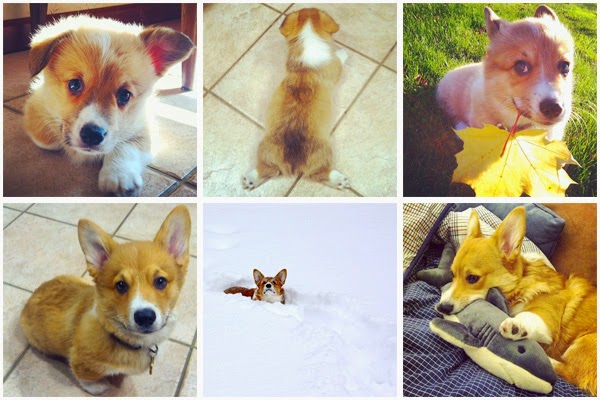
In other, more adorable news, back in October my husband and I brought a puppy home! We now have a Welsh Pembroke Corgi named Bilbo and he is so much fun. He has been a wonderful addition to our new home. I post photos of him on Instagram fairly often, so feel free to follow me there if you want to join in the Corgi cuteness.


Bilbo was my inspiration for the illustration that I made for my annual holiday card The illustration is titled Winter Corgi and was made using a combination Adobe Illustrator and Photoshop.


Winter Corgi is available for sale in my Society6 shop. You can purchase prints of this illustration, as well as mugs, throw pillows, tote bags, and more. Stop by the shop to view all of the options.  
Over the next few weeks I plan on getting back in to the swing of sharing artwork on my blog. Don't forget, you can also follow me on Instagram or like my page on Facebook to stay up to date on everything that is going on.


Wednesday, May 28, 2014

Lake Bonaparte - Commission


Last week I finished this commission painting of a family's cabin area on Lake Bonaparte in the winter. The lake was frozen and covered in snow in the reference photo that I was working from.  The final watercolor painting measured 11" x 14".

If you're ever interested in commissioning me to do a painting, just drop me a line.  My availability for commissions varies throughout the year depending on other projects that I'm involved with, but I'm always willing to talk with you.

Saturday, February 16, 2013

Red Pandas In The Snow


Happy Saturday! Here is a new watercolor that I painted this week of a pair of red pandas playing in the snow. The finished painting measures 10" x 8".  I couldn't help myself, red pandas are just too adorable.  If you haven't seen it before, here's a youtube video that shows them hopping around.  And of course, the now infamous startled baby red panda.


This painting is available for purchase in my Society6 shop as art prints, t-shirts, pillows, iPhone cases, tote bags, and more! Hop on over and have a look around.


Monday, March 7, 2011

Fox Run


I've been meaning to make a piece of art that would lend itself well to a wrap-around design for a ceramic mug. Today's snow day presented the perfect opportunity! This was done with watercolor paint and then some digital edits in Photoshop. Measures 10" x 5", completed March of 2011.

This painting is available as an art print or as a ceramic mug through my print shop. If you get a mug, take a photo of it in use and send it to me! I'd love to see it.

Friday, December 10, 2010

New painting in progress


Last night I did some more work on that painting that I posted the start photo of yesterday. I was mainly working on blocking out colors and values on the roofs of the buildings. This painting measures approximately 12" x 18" and is being done with acrylic paint on watercolor paper.

Thursday, December 9, 2010

Oh deer...and a snow day


Nothing fancy, just a recent sketchbook page.

Yesterday was a snow day, so I used the day off from teaching to start a new painting. School is back to normal today, so I'm planning to continue working on the painting this afternoon.


Also, don't forget - free economy shipping from my print shop on orders over $10! Only a week left on that offer.

Tuesday, November 30, 2010

Snow and Evergreens - new art and prints


This image was the result of experimenting with a combination of art techniques. This started out as a print made from a sheet of styrofoam that I drew and carved into. I used it to print with black ink on white paper, then scanned it and added all of the color digitally. I would have liked to actually print it with the colors, but I just don't have the set up at this time to do prints with color alignment.

Prints are now available!

Also, there is a promotion going on right now with my print shop. When you spend at least $10 you will get free economy shipping! It's the perfect time to pick up something for yourself or for some holiday gifts.

Friday, December 4, 2009

Recycled Plastic Bag Christmas Wreath

Earlier this week I made a Christmas wreath for the apartment's front door. It actually looks great as just a general winter wreath, so I plan on keeping it up beyond the holiday season.


There was a pile of plastic grocery store bags in my kitchen that I kept forgetting to recycle at the store. I was gathering them all together when I got the idea to make something out of them. I've seen Christmas wreaths made out of rags before, so I thought why not try that with the plastic bags?


I started with a green wire wreath frame from Michael's, purchased rather inexpensively by using a coupon and my teacher discount. However, I thought that with that frame alone, the finished wreath would look too skinny.  You could also make your own frame out of wire, if you have enough, but I was looking to cut out that step by purchasing the ready to go wire frame.  If you do make your own frame, I suggesting twisting the wire double for more durability, like I did with the extra ring I added below.


I solved that issue by adding an inner ring to the frame with some aluminum wire that I had already on hand, twisting it double for strength. I used thinner wire to hold it to the frame.


After that I just started tying plastic strips cut from the bags onto the wire frame, using a double knot so that they wouldn't come undone. No glue is needed.  I didn't cut the strips in any uniform manner because I wanted the plastic to look somewhat leafy when I was done. I also cut off any letters or logos because I didn't want those to show. The bags I used were all either white plastic bags (from Target) or transparent grocery bags (from Wegmans).  It is also easy enough to go back and trim any overly large pieces of plastic bag at the end if there are any bits that are sticking out too much.


When I bought the wreath frame, I also bought some plastic silver leaves and small branches to include in the wreath, found in the holiday fake flower section at Michael's. I used the thinner wire to secure the branches onto the wire frame, and then I tied the plastic strips over the stem to hide it. The supplies for this project were cheap, with the branches costing anywhere from $0.29 to $0.49. I bought the stems on a separate day from the wire frame so that I could use more than one coupon.  All told, I spent maybe $10 at the most on supplies.


I didn't keep an exact count of how many bags I used, but it had to be at least 30 plastic bags or more. Tying all of the plastic strips on took a while, but it was an easy project to work on while watching some DVDs. The finished wreath is about 20" wide and very lightweight, so it's easy to hang with a 3M plastic hook and sticky tape. I definitely plan on saving this wreath to use next year.

Thursday, December 25, 2008

Four Owls - 2008 Holiday Card

Happy Holidays, everyone! I hope you're all having a good time and enjoying the season.

This was my design for my holiday card this year. The final illustration measures 10" x 14" and was painted with acrylic paint on Bristol board. The snow was added later in Photoshop, using an inverted ink splatter that I made and scanned for this purpose. So the image is still mostly traditionally done, but with some post-production stuff handled in Photoshop.

I'll be making prints of this available eventually, and I'll be sure to post a notice here when I do so.

Tuesday, December 2, 2008

Holiday Trees

I've been playing around with some ideas for my annual holiday card. I painted these trees the other night (watercolor paint and acrylic paint on watercolor paper, measuring 10" x 8"), after being inspired by some artwork by Mary Blair. I don't think I'm going to wind up using this for my card, but I might wind up playing around with it for a different illustration idea I have in mind.

Tuesday, January 15, 2008

Arctic Queen


First completed picture of the new year!

I designed this picture to use for my 2007 holiday card. It took me a while to get it done (the card is actually a bit late being mailed out), but I'm happy with the final product. I saved progress images for this, so I'll be uploading a mini-tutorial of sorts eventually. The fairy tale East O' the Sun, West O' the Moon was my inspiration for this picture.

Wallpaper sized versions of this picture can be downloaded right here through my deviantArt gallery.

Prints of this picture are available right here through my print shop.

Wednesday, December 12, 2007

The Making of a Picture - Part 2


I didn't want people to think that I've forgotten about including a behind the scenes look at how I'm putting my holiday card picture together, so I thought I'd include a mini-update on the coloring progress.

When I post the completed image I'm planning on sharing a whole bunch of work in progress images so that you can get a better idea about how I approach the digital painting aspect of one of my pictures.

Tuesday, November 27, 2007

Frosty Lion


The topic for Illustration Friday this week is "the zoo". I always wonder what the animals at the zoo do when the weather turns cold, especially the animals that usually live in warmer climates. For example, lions live in the Serengeti, not the harsh winters of upstate New York. Yeah, he has that big fur coat, but still. Cold is cold.

The sketches below were just me playing around with a couple other ideas for this week's topic. I had to work kind of quick this week since I'm going out of town tomorrow, and I was determined to have something to show for this IF topic.

Sunday, November 18, 2007

The Making of a Picture - Part 1

Each year I make a holiday card to mail out to my friends and family. These were the cards for 2006, 2005, and 2004. I usually try to stick with a winter theme instead of focusing on a specific holiday. For a while I've been wanting to do an illustration with a polar bear, so I figured this year's card would be a great chance. Some might think I had The Golden Compass in mind when I decided on using a polar bear, but I was inspired by the fairy tale East of the Sun and West of the Moon. Kay Nielsen's artwork for this story was especially inspiring, with this particular image planting the definite sparks of an idea in my head.


I thought it would be nice to share a bit of information on how I sometimes go about completing an image, so I'm planning to do that with this illustration.

The first thing I did, after looking up various images of polar bears online for reference, was to sketch out my idea in Photoshop with my tablet. I've gotten into the habit of doing my rough planning for pictures in Photoshop because I can make edits very quickly and easily. It's especially helpful to have the options of flipping images, changing the size, or moving certain parts around.


This got the primary idea out of my head and down in front of me where I could look at it. However, the woman on the polar bear wasn't quite right. After showing it to my boyfriend, he suggested that I take some reference photos to use. It was excellent advice, so I set up my camera on a timer and took some reference photos. Below are the two main references that I wound up using for this picture.

Armed with references photos, I went back and edited my Photoshop sketch.

Now that I had my design planned out to a point I was happy with, I went about transferring it to paper. I used brown colored pencil and a tiny bit of pen and ink (for some fine details on her face and hair ornaments) to draw the picture on to a 24" x 18" sheet of watercolor paper. Then, using watered down black ink, I painted ink washes over my pencil lines to lay down base values. These will make the digital coloring process easier for me and it also helps lend a traditional painting touch to the completed image.

Coming soon...coloring!